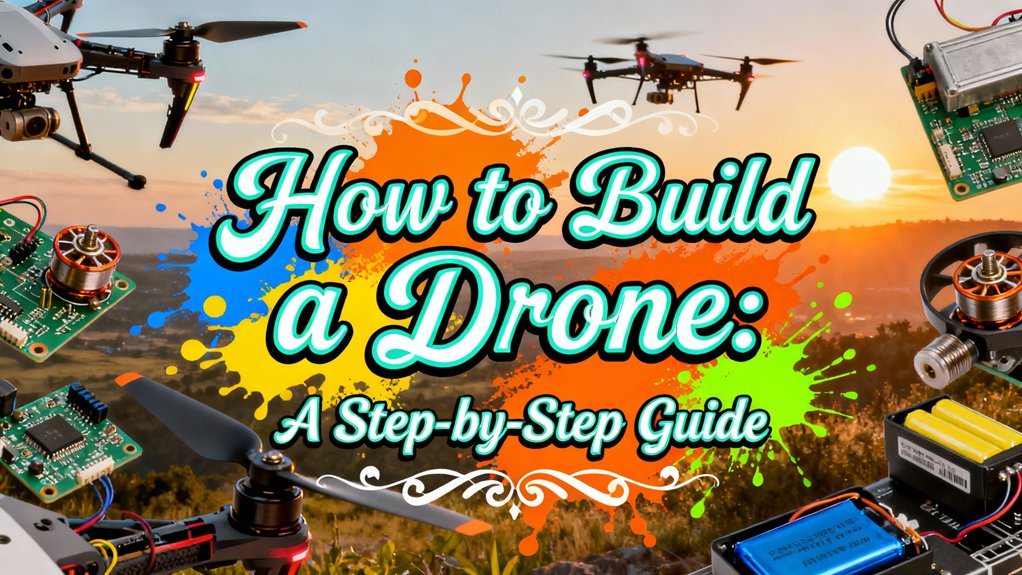
Building your drone requires systematic integration of seven core subsystems: select a carbon fiber or engineering plastic frame matching your mission profile, then mount brushless motors with ESCs rated 20-40% above peak draw. Install your flight controller near the center of gravity with proper vibration isolation, connect a LiPo battery matching your voltage requirements, and wire FPV equipment with twisted pairs to minimize EMI. Flash firmware via Betaflight Configurator, tune PID parameters through iterative testing, and complete preflight checks before maiden flight. This guide covers each subsystem’s technical specifications and integration protocols.
Selecting Your Frame and Understanding Structural Requirements
Your frame constitutes the primary load-bearing structure and defines every subsequent design constraint—motor spacing dictates propeller size, wheelbase determines flight dynamics, and mounting interfaces lock in your electronics stack architecture. Frame geometry selection begins with mission profile: tight wheelbases enhance agility while longer configurations improve stability. Material selection drives performance boundaries—carbon fiber delivers excellent stiffness-to-weight ratios for racing applications, while engineering plastics offer impact resistance and rapid prototyping capabilities. Arm thickness directly correlates with durability; 5″ racing frames typically specify 5–6 mm arms, whereas micro builds employ 2–2.5 mm sections. Design tradeoffs emerge constantly: unibody frames maximize structural integrity but sacrifice crash repairability, while modular configurations enable component replacement at the cost of added weight distribution complexity and reduced stiffness balance. Frame weight also impacts your battery’s flight duration, as heavier structures increase power draw and reduce the typical 20-40 minutes of flight time available from consumer-grade power systems. Power system planning must account for battery specifications, with racing applications benefiting from high C-rating packs that deliver rapid discharge rates of 50C to 90C for maximum thrust responsiveness. For budget-conscious builders, aluminum alloys present a compelling middle ground, offering cost-effective manufacturability through standard CNC machining processes while maintaining repairable bent components that carbon fiber cannot match. Professional applications like law enforcement and search-and-rescue operations demand rugged builds that withstand harsh environmental conditions and extended deployment cycles beyond typical recreational usage patterns. Specialized commercial applications such as coordinated light shows require FAA approvals and significantly higher investment levels, with large-scale productions utilizing hundreds of drones exceeding $100,000 in total costs. Video transmission system integration requires mounting considerations for your chosen VTX configuration, with compact options like the HGLRC Zeus Nano providing clean transmission output while occupying minimal space on smaller frame architectures.
Choosing Motors, ESCs, and Propellers for Optimal Performance
How do you extract maximum performance from your propulsion system while maintaining thermal margins and efficiency? Start with motor selection by matching KV ratings to your mission profile—low KV (300-600) for endurance with large props, high KV (2300+) for racing agility. Propeller sizing follows frame constraints and motor capabilities; calculate thrust-to-weight ratios using manufacturer tables, targeting 2:1 minimum or 5:1 for competitive applications. ESC ratings must exceed motor draw by 20-40% margin—if your motor pulls 23A continuous, specify 30A ESCs minimum. Weight considerations affect every component choice. Conduct performance testing through bench measurements and flight validation, monitoring heat management throughout. Optimize efficiency by iterating prop sizes while tracking current draw and thermal behavior until you achieve stable operation within component specifications. For beginners exploring drone building on a budget, consider researching spare-part availability for your chosen components to minimize long-term maintenance costs. Before your first flight, ensure you understand FAA regulations such as flying below 400 feet and registering drones over 0.55 pounds to operate legally. Verify that voltage compatibility between your motor, ESC, and battery matches your system configuration to prevent power loss and component damage. Additionally, equip your drone with a flight termination system as a safety measure that allows you to safely ground the aircraft in emergency situations.
Understanding LiPo Batteries and Power Distribution Systems
Lithium Polymer batteries form the electrical backbone of your drone’s power system, delivering energy through a multi-cell architecture where each cell maintains a nominal voltage of 3.7V. A 4S configuration generates 14.8V nominal (4 × 3.7V), scaling power delivery to match your motor requirements. You’ll maintain cells within 3.2V-4.2V operational range—voltage management that prevents permanent damage.
Your battery’s C rating determines maximum continuous amp draw: multiply capacity in amp-hours by C rating (5.1Ah × 10C = 51A). This figure must exceed your drone’s total current draw calculated by multiplying single-motor maximum by motor count. Monitor your battery’s internal resistance to assess health and performance, as lower IR values enable more effective power delivery to your motors and indicate better battery condition.
Balance charging equalizes individual cell voltages for peak battery maintenance, while storage charging targets 3.80V-3.85V per cell. Connect both discharge and balance leads to your smart charger, ensuring proper polarity alignment. Modern smart battery management systems enhance safety by monitoring temperature, voltage, and current during flight operations. While LiPo batteries excel at higher discharge rates for performance applications, they typically have shorter cycle lives compared to Li-ion or LiFePO4 alternatives. LiPo batteries use a gel-like polymer electrolyte that makes them lighter and more flexible than traditional Li-ion batteries with liquid electrolytes. Leading manufacturers like DJI, Tattu, and Gens Ace offer batteries with stable voltage output and extended cycle life across racing, FPV, and photography applications. Before operating your completed drone, verify compliance with FAA registration requirements if your aircraft exceeds 0.55 lbs, as federal regulations mandate proper documentation for unmanned aircraft systems.
Installing and Configuring the Flight Controller
The flight controller processes sensor inputs and generates motor commands at rates exceeding 8kHz, functioning as your drone’s central processing unit. Mount it near the frame’s center-of-gravity with the heading arrow pointing forward. Flight controller orientation requires the top-side up configuration across all platforms—multirotor, fixed-wing, and VTOL. Apply vibration isolation per manufacturer specifications.
For power connection setup, verify input specifications before wiring. Connect 5V and ground to designated pads, or use unmarked two-wire configurations as applicable. Don’t connect LiPo during initial setup; USB provides sufficient power. When connecting camera equipment, use specific points on the board designated for these peripherals. Many builders opt for lightweight mini camera drones under 250g weight to comply with regulations while maintaining portability.
Install Betaflight Configurator from GitHub releases. Connect via USB, select the COM port, and establish connection. Calibrate accelerometer and gyroscope on a level surface post-firmware flash. Configure receiver connections at RX1/TX1 pads, then calibrate voltage sensors using multimeter measurements. The receiver decodes commands transmitted from your remote control using radio frequencies, typically operating in the 2.4 GHz band for reliable communication with the flight controller. Wire ESC signals to the flight controller using the labeled S1-S4 connectors corresponding to each motor’s position. To pair your controller with the drone, power on both devices and hold the power button for approximately eight seconds until the indicator lights flash, signaling successful pairing mode activation. For indoor flight operations, consider installing protective cages around the propellers to shield against collisions with walls and obstacles in confined spaces. Advanced setups may incorporate omnidirectional obstacle avoidance systems similar to those found in professional camera drones for enhanced collision prevention during autonomous flight.
Integrating Sensors for Stability and Navigation
Once your flight controller is operational, sensor integration becomes the critical next phase that determines your drone’s stability performance and navigational capabilities. You’ll need to evaluate sensor types based on your application requirements—IMUs deliver high-frequency orientation data up to 400 Hz for stability, while AHRS systems provide real-time state estimation. For precision applications, MEMS gyroscopes like the ER-3MG-103 offer ±400°/s range with zero bias instability under 0.1°/h. Advanced systems for light show performances may incorporate heated IMUs to ensure consistent readings across varying environmental conditions during outdoor events.
Effective data fusion is essential for ideal performance. Implement nonlinear graph optimization to merge inertial data with visual and radar inputs for accurate pose estimation. In GPS-denied environments, combine LiDAR with visual sensors to enable SLAM capabilities. Configure your software stack to process multi-sensor streams, ensuring proper calibration through systematic field validation before deployment. Consider implementing dynamic mode-switching for self-position estimation based on object state to further enhance accuracy when GPS signals are unavailable. If you plan to mount action cameras for aerial photography, select lightweight GoPro models like the Hero 11 Mini or Bones to minimize impact on flight performance and battery efficiency. Professional-grade applications such as surveying often rely on RTK/PPK positioning to achieve centimeter-level accuracy for mapping and terrain analysis. For builders working on smaller platforms, understanding propeller guards can help protect your sensors and improve crash resistance during test flights. Beyond technical applications, mastering sensor integration can open opportunities for drone mapping services, which are increasingly in demand across industries like real estate, construction, and surveying.
Setting Up Your Radio Control System and Receiver
Radio control system architecture forms the primary command interface between pilot and aircraft, requiring careful protocol matching and hardware integration to achieve reliable control authority. You’ll guarantee receiver compatibility by matching transmitter protocols—FrSky D16, ExpressLRS, SBUS, or Spektrum DSMX—verifying channel count and physical interface (PWM, PPM, serial UART) with your flight controller’s capabilities.
Execute binding procedures following vendor-specific sequences: activate transmitter bind mode, then power the receiver while monitoring LED status for successful pairing. Implement proper wiring techniques by connecting signal, power, and ground to designated FC pins, enabling Serial RX for digital protocols in firmware.
Configure failsafe settings, perform radio calibration in your ground station, and complete channel mapping to assign throttle, yaw, pitch, roll, and auxiliary functions. Route antennas strategically, avoiding carbon-fiber interference for maximum link integrity. For advanced applications requiring long-range transmission, professional systems utilize OcuSync 4 technology to maintain reliable control links over extended distances. Many pilots also install anti-collision lights on their drones to improve visibility during night operations and comply with aviation regulations. For pilots operating under Part 107 certification, these lights must be visible from three statute miles and flash at a rate of 40-100 times per minute to meet FAA nighttime flight requirements. If you plan to capture aerial footage, consider that your drone’s payload capacity must accommodate camera weight while respecting regulatory weight limits that determine flight restrictions and registration requirements. Navigation lights help pilots determine the drone’s heading and direction when flying at a distance, with green lights on the tail indicating GPS lock and home point recording on models like the DJI Mavic. Verify that both your transmitter and receiver operate on matching firmware versions to ensure successful binding and reliable communication throughout flight operations.
Installing FPV Camera and Video Transmission Equipment
First-person-view systems integrate camera sensors, video transmitters, and RF components into a real-time telemetry pipeline that delivers piloting perspectives directly to your ground station display. Select a CCD mini camera rated 600-1000TVL with 5V-12V compatibility and 150mA-200mA current draw. Install your mounting deck, securing the bracket with proper camera alignment at 15°-20° downward tilt. Solder JST-male connectors to power wires, ensuring power filtering through your VTX’s regulated 5V output or dedicated BEC converter. Route the yellow video signal wire from camera output to transmitter input, twisting signal and ground pairs to suppress ESC interference. Position your VTX rearward, maintaining separation from GPS and receiver modules. Connect the antenna before energizing the transmitter to prevent immediate burnout. Verify common ground connections between components. The transmitter sends commands via radio frequency signals that the drone’s receiver processes for flight control. Consider choosing between video systems like DJI, Walksnail, or HDZero based on your priorities for image quality, latency, and range. For advanced applications requiring autonomous tracking or obstacle detection, higher-end camera systems with AI processing capabilities may be integrated into custom builds. For optimal picture quality and range, many pilots pair their custom builds with the DJI Goggles 3, which offers compatibility across multiple FPV systems. Modern digital systems offer significant advantages in image fidelity and range compared to traditional analog transmission. Power on your goggles by holding the button for 3-4 seconds to begin receiving the video feed.
Wiring, Soldering, and Electrical Assembly Best Practices
Clean electrical integration distinguishes reliable platforms from those prone to intermittent faults, burnouts, and electromagnetic interference. Select wire gauge using AWG tables to match current loads, preventing voltage drop and heating. Choose stranded, silicone-insulated wire and connectors rated above peak amperage. Form mechanically sound solder joints by tinning both surfaces, maintaining appropriate iron temperature (350–400°C for power connections), and limiting pad contact time. Inspect joints for proper concave fillets and cold-solder defects. Route high-current runs on short, twisted paths to minimize EMI loop area. Separate power and signal lines within your component layout. Install low-ESR capacitors near ESC inputs for noise filtering. Before connecting the battery for the first time, use a smoke stopper to protect components from potential shorts. Secure wire insulation with zip ties or clamps near joints for stress relief. Use appropriate connection types per application and maintain harness documentation for troubleshooting. Maintain low-resistance wiring throughout your electrical system to minimize power loss and maximize efficiency during flight operations. For specialized applications, drones can be outfitted with radiation detection tools such as dosimeters and gamma-ray sensors to monitor hazardous environments. Advanced military platforms like the Boeing MQ-28 demonstrate sophisticated electronic warfare resistance through careful electrical architecture and shielding design. When sourcing batteries and electrical components, local electronics stores offer the advantage of hands-on inspection to verify compatibility with your specific build before purchase. Consider installing signal boosters to enhance communication reliability and extend operational range during flight operations.
Firmware Installation and PID Tuning for Flight Optimization
Once you’ve completed mechanical assembly and electrical integration, firmware installation establishes the software foundation that translates pilot inputs into coordinated motor commands. Connect your flight controller via USB while powered off, then flash firmware using Mission Planner, Betaflight Configurator, or manufacturer-specific tools. Verify installation by checking version numbers in system information pages post-reboot. After confirming firmware updates, begin PID adjustments through configurator tuning tabs. Start with default values, then optimize through iterative flight testing. Increase P-gain until oscillations appear, reduce by 10-20%, then tune I-gain for position hold. Boost D-gain to counter overshoot during aggressive maneuvers. Deploy blackbox logging to analyze gyro traces, applying dynamic notch filters to eliminate noise. Configure feedforward and TPA settings for throttle-dependent response refinement, ensuring stable flight characteristics across the performance envelope. When selecting components, consider that F7 processors excel in demanding tasks like freestyle and racing, offering superior performance compared to entry-level F4 options. For obstacle avoidance systems, advanced models incorporate LiDAR and omnidirectional sensing to enhance automated navigation and collision prevention. Some commercial drones feature proximity sensors that enable autonomous flight patterns and collision prevention without requiring manual pilot intervention. If you plan to extend your operating range beyond stock capabilities, consider that signal boosters and high-gain antennas can increase range by 30% to 70% under optimal conditions, though effectiveness varies with environment and interference levels. Regular firmware updates are essential to maintain flight system confidence as they refine how the aircraft interprets the environment and enhance overall stability. Builders interested in payload capabilities should understand payload vs. endurance tradeoffs, as increased weight reduces flight time and necessitates more powerful motors and larger batteries.
Preflight Testing, Safety Checks, and First Flight Procedures
Before initiating your drone’s maiden flight, execute a thorough preflight checklist that validates environmental conditions, regulatory compliance, airframe integrity, and system functionality. Preflight weather assessment requires conditions below 10% precipitation probability, winds under 15 mph, and three-mile visibility minimum. Regulatory checks mandate current Part 107 certification, drone registration display, Remote ID activation, and airspace clearance via B4UFLY or LAANC. Physical inspection encompasses frame examination for structural damage, propeller verification, sensor cleanliness confirmation, and battery evaluation for swelling or charge depletion. System tests include GPS lock validation, compass calibration, control response verification, and failsafe configuration. Safety procedures demand cleared takeoff zones, emergency protocols, pre-planned flight paths respecting altitude restrictions, and final diagnostic verification before motor initialization. Operators must also comply with FAA requirements such as flying below 400 feet and maintaining visual line of sight throughout the flight. Understanding local regulations is critical, as regional drone laws may impose additional restrictions beyond federal requirements that affect where and when you can operate. For your initial flights, practice fundamental maneuvers in open environments like meadows or parks, focusing on mastering basic movement controls including throttle adjustment, hovering stability, and controlled landing techniques. If your drone weighs over 250 grams, ensure you’ve completed the drone registration process, which costs $5 and remains valid for three years. Maintain detailed equipment logs to track maintenance patterns and identify recurring issues that may affect flight performance. Depending on your needs, consider whether a multi-rotor drone with vertical takeoff capabilities or a fixed-wing model suits your intended missions.