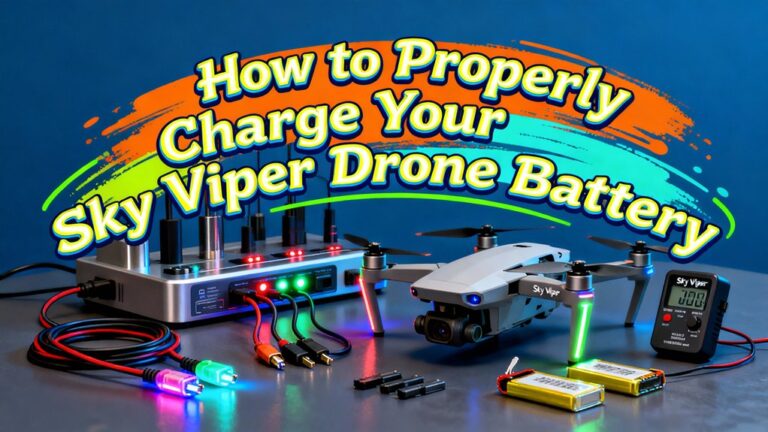
To reset your Sky Viper drone controller, first connect your device to the drone’s Wi-Fi network using the default SSID format SKYVIPERGPS-xxxxxx and password “vipergps.” Navigate to the local IP address 192.168.99.1 in your browser, then locate the Factory Reset option under System Control in the calibration interface. Power cycle both devices afterward, then re-pair them by powering on the drone first, followed by the controller. Hold the trim buttons and power button for five seconds to enter search mode. Solid LED lights indicate successful connection. For detailed troubleshooting steps and maintenance guidance, specific instructions await.
Understanding Your Sky Viper Controller
Before you can reset your controller, you’ll need to identify which Sky Viper model you’re working with, since controller types vary considerably across the product line. Entry-level models use basic 2.4 GHz thumbstick transmitters with simple trim buttons, while performance controllers feature USB-C charging and programmable sticks tailored to ergonomic preferences. GPS-enabled variants include dedicated Return-to-Home buttons and auto-pilot functions.
Examine your controller’s physical layout to determine its capabilities. Check the battery options—most use replaceable AA or AAA batteries, though newer models offer rechargeable internal batteries with smart battery management systems to enhance safety and performance. The Sky Viper Type-R Racing Drone includes a 2.4GHz transmitter for extended range control. Review your manual for binding sequences and calibration methods specific to your model. Understanding RF characteristics and firmware updates available for your controller guarantees you perform the correct reset procedure for maximum performance. Like DJI drones, many Sky Viper models prioritize advanced obstacle sensing to improve flight safety and reliability. Proper binding procedures ensure your transmitter and receiver communicate effectively before attempting any reset operations. For GPS-enabled models like the V2450GPS, you may need to reset the WiFi password to its default during the pairing process to restore full functionality. All drones over 250 grams must comply with Remote ID regulations to ensure proper identification and regulatory compliance.
Preparing Your Drone and Controller for Reset
Now that you’ve identified your specific Sky Viper model and reviewed its controller features, you’ll need to prepare both devices before attempting any reset procedure. Start with a thorough battery check—verify your drone’s charge reaches at least 90% and inspect for swelling or damage. Ascertain controller batteries are fresh and fully charged. Remove propellers and secure your drone on a level, non-magnetic surface as critical safety precautions. Clear the area of metal objects and magnets that could interfere with calibration. Verify your Wi-Fi connection to the drone’s network and confirm successful controller pairing. Before powering down, ensure you access the web browser interface to note your quadcopter’s IP address for any calibration adjustments you may need during the reset process. For optimal results, connect your smartphone to the remote controller using a compatible USB cable to access the drone app and verify all settings before proceeding. Power down all devices, then you’re ready to proceed with your reset safely and effectively.
Accessing the Calibration Web Interface
How do you reach the Sky Viper’s calibration tools? You’ll access the calibration interface through your drone’s built-in web server. First, connect your device to the drone’s Wi‑Fi network—it’ll broadcast an SSID formatted like SKYVIPERGPS-xxxxxx. Enter the default password “vipergps” when prompted.
Next, open a web browser and navigate to the primary local IP address: 192.168.99.1. Alternatively, you can use the offline-cached URL http://fly.sky-viper.com/calibration.html, which resolves to the same interface. To ensure a stable connection, consider enabling auto connect for the Wi-Fi network to avoid disconnection issues during calibration.
Once loaded, you’ll see the calibration menu at the top. Desktop browsers work best for web access to calibration features. If the interface doesn’t appear, power-cycle your drone, verify your Wi‑Fi connection, and retry the address. For optimal control responsiveness, ensure sufficient battery power for both your drone and controller during the calibration process. Successfully linking your remote controller and drone requires proper calibration before flight operations. Like connecting a GameSir controller to your mobile device, proper pairing of your remote controller and drone is essential for reliable operation. Professional-grade drones utilize thermal sensor resolution capabilities for advanced applications, though consumer models like the Sky Viper focus on fundamental calibration and control features.
Performing a Factory Reset
Once you’ve located the calibration interface, you can proceed with resetting your controller and drone to factory defaults. You’ll find the Factory Reset option under System Control on the web page. Click it to initiate the reset process.
Factory reset benefits include restoring controller performance to ideal levels and clearing any corrupted settings that may cause flight instability. After triggering the reset, power cycle both your drone and controller completely. Turn them off, wait several seconds, then power them back on. Before flying, ensure your drone is placed on a flat level surface to prepare for the recalibration process. To prevent battery damage during this process, avoid charging your controller or drone battery immediately after the reset if it was recently in use and needs temperature stabilization to room temperature. Following the reset, you’ll need to recalibrate main components including acceleration, magnetometer, and motors to ensure optimal functionality.
You’ll need to re-pair your devices once they’ve rebooted. Expect that your Wi-Fi password and SSID will revert to defaults. This reset clears all custom configurations, so you’re starting fresh. If your controller was previously linked to another drone, you may need to unlink it first before re-pairing with your current device. Successful pairing is usually confirmed by stable LED lights and audible beeps from either the remote or drone. Verify successful completion by checking that both devices respond normally to your commands. Be sure to review FAA regulations applicable to your location before conducting any test flights after recalibration.
Resetting Your WiFi Password
After completing your factory reset, you’ll need to restore your WiFi password to regain access to your drone’s interface. Your Sky Viper automatically reinstalls default credentials during the reset process, eliminating manual password entry.
You’ll find your drone’s SSID listed as SKYVIPERGPS_xxxxxx, where xxxxxx matches your drone’s serial number. Connect using the default password “vipergps” for WiFi security purposes.
Once connected, access the WEB AP at 192.168.1.1 to manage password management settings. Navigate to the System Control tab where you can customize your WiFi password beyond the default credentials. The drone creates its own Wi-Fi network for connection, allowing you to stream video from various locations without requiring a home network. Establishing a secure connection between your controller and drone ensures reliable communication for flight control.
For controller-paired devices, you can reset your WiFi password specifically by holding L Trim, R Trim, and Power buttons simultaneously for three seconds. Both the drone and controller will indicate pairing progress with flashing lights or beeping sounds during this reset sequence. First connections may require up to 45 seconds on certain devices. To verify successful pairing, push the left throttle stick all the way up and then pull it all the way down to complete the synchronization process. Confirming a successful connection through indicator lights and sounds will verify that your controller and drone are properly paired after the reset process.
Troubleshooting Common Controller Problems
Even when you’ve successfully reset your drone and controller, you might still encounter issues that prevent normal operation. Check that your throttle stick rests fully down, as partial positions prevent flight. If your controller beeps continuously after the drone’s lights slow, wait five minutes for the beeping to stop, then attempt reconnection.
Address connection interference by reorienting your antenna and increasing separation between devices. Change your power outlet circuit if interference persists. Verify your drone battery isn’t depleted by attempting a recharge. If beeping continues after charging, you may have a dead battery or faulty controller board requiring replacement. New batteries in the controller may resolve temporary connectivity issues that persist after standard troubleshooting.
For persistent unresponsiveness despite successful WiFi connection, power cycle both devices completely and re-pair them before flying.
Reconnecting After a Reset
Now that you’ve completed the factory reset, you’ll need to re-establish the connection between your drone and controller before you can fly again. Start by powering on your drone first, then your controller. Hold the trim buttons and power button together for approximately five seconds until you hear a beep, indicating search mode. Position yourself within a few feet of your drone on a level surface to guarantee a reliable pairing process.
Watch for solid LEDs on both devices—they confirm successful connection. If LEDs continue flashing, you’re experiencing connection issues. Repeat the pairing process and verify that your controller has fresh batteries and your drone battery is fully charged. If the STM32 board is overheating or malfunctioning, you may need to diagnose it via USB-to-serial connection before proceeding further. Avoid Wi-Fi routers, metal structures, and other RC transmitters during pairing, as these environmental factors can disrupt the precise control that ensures stable communication between your devices. If problems persist, relocate and retry the sequence.
Verifying Successful Controller Reset
Once your drone and controller are paired and communicating, you’ll want to confirm that the reset has fully taken effect by checking several key indicators. First, verify that your transmitter firmware shows an identifiable version instead of displaying “unknown unknown.” Next, check the flight firmware on your drone—it should display a known version number as well.
Navigate to the web interface’s System Control tab and confirm that default settings are active. These reset indicators demonstrate that your controller has successfully completed the reset process. Maintaining proper hand posture during testing will help you accurately assess controller responsiveness and identify any remaining issues. Remember that the remote must be re-linked to the drone after each power cycle to maintain proper functionality. Be aware that flying your drone requires compliance with FAA regulations including altitude limits and registration requirements. Consider how dual camera systems on advanced models can enhance your aerial documentation capabilities. For additional troubleshooting if issues persist, you may need to use software tools or computer-based recovery options to restore factory defaults. Finally, test basic functionality by toggling photo and video commands through the web interface. If all these elements check out, your controller reset is verified and operational.
When to Seek Professional Support
If you’ve completed a full reset and verification but your controller still isn’t functioning properly, it’s time to contemplate professional repair options.
Contact the manufacturer’s warranty support if your controller’s within the warranty period and exhibits non-user-caused defects. They’ll handle diagnostics and replacements using official parts and firmware tools.
Choose a local third-party repair shop when you need urgent turnaround or your warranty’s expired. Vetted specialists can replace common mechanical parts like joystick potentiometers and connectors quickly. For complex drone repairs, consider reaching out to DJI Authorized Service centers that offer guaranteed workmanship and have technicians trained at the DJI facility. Ensure your replacement parts meet quality standards comparable to LiPo batteries used in professional drone operations. Professional technicians can also verify that LED status indicators are functioning correctly to confirm proper communication between your controller and aircraft.
Seek professional repair for persistent issues like radio-link failures after rebinding attempts, intermittent control dropouts across multiple aircraft, or visible water intrusion and corrosion inside the housing. These problems indicate internal faults requiring technician diagnostics and board-level repair beyond DIY capabilities. Professional repair technicians should verify compliance with aviation regulations to ensure your drone operates within legal requirements. Advanced drone controllers increasingly incorporate real-time surveillance capabilities similar to those found in modern reconnaissance systems to enhance operational awareness. For advanced drones with obstacle avoidance capabilities, internal sensor faults may also necessitate professional diagnostics to ensure safe operation.
Maintenance Tips to Prevent Future Issues
Your Sky Viper drone’s longevity depends on consistent preventive maintenance that addresses three critical areas: battery health, controller reliability, and mechanical integrity.
For battery maintenance, you’ll store cells at 40–60% charge and inspect them regularly for swelling or corrosion before each flight. Use only manufacturer-specified chargers to avoid thermal stress. Neglecting battery care can lead to increased friction, overheating, or motor failure, compromising both safety and performance. Battery specifications across Sky Viper models commonly include 3.7V lithium polymer batteries with capacities ranging from 650mAh to 800mAh, with higher-capacity options delivering extended flight capabilities. However, upgrading to a higher mAh battery requires careful consideration of weight and compatibility factors to ensure optimal drone performance. Most consumer drones see battery capacity drop to 80% or less after 200-300 charge cycles, so tracking your charging history helps predict when replacement becomes necessary. For maximum longevity, consider that LiFePO4 batteries offer exceptional cycle life exceeding 2000 cycles, though they may require compatibility verification with your specific model.
Controller care involves cleaning gimbals with compressed air, replacing batteries on schedule, and verifying firmware updates when available. You’ll also recalibrate trims and compass periodically to prevent drift. For enhanced recording sessions, consider whether your controller supports audio capture via phone sync for synchronized sound during flights.
Performance checks require you to inspect propellers for damage, remove motor debris, and verify all frame screws are tight. Balance propellers after replacement to reduce vibration.
Finally, firmware updates keep your system optimized. You’ll back up configuration files before updating and perform full sensor calibrations on a level surface afterward to maintain accurate flight control.